Pages

Thursday, 15 October 2015

You can have great brows too!


Flashback 5 years ago, who could have predicted how eyebrow OBSESSED we would be now?! Back in the day I'm sure we all committed some brow sins, whether it was tweezing them to near extinction or covering them with foundation until they were no longer visible... We've all been there. So here's some little tips and tricks on how to get the perfect "Instagram Brow!"


1) Its all about the shape.
Every day I see brows of all different shapes and sizes; over plucked brows, brows that haven't been touched and almost all of the time we can do something with them. I can't stress enough how important it is to see someone to regularly shape your brows, as there are view few woman I've seen who can do their own brows and not get carried away. A professional takes your face shape, hair colour, makeup style etc. into consideration when tailoring your brow and uses a range of techniques to perfect your brows! I always recommend HD Brows to those enquiring as I genuinely believe they are the original and the best. However if you do choose to do your own brows, have a look at your face shape... If you have small facial features, will you really suit a larger brow? If you have plenty of eyelid space, would they really benefit from being thinned out? 

2) Products, Products, Products!
Now what products you use depends on your makeup style and what you want to achieve, but for the purpose of this post we are talking carved out, perfectly sharp Instagram brows! This technique will take time to master, but once you have it you'll love the result. Firstly (and most importantly), is finding a good eyebrow brush! There are so many on the market out there that it can understandably be a little overwhelming trying to choose one so I thought I'd share my 2 personal favourites. The Zoeva 322 Brow Line is perfect for a sharp line at the base of the brow and for creating a precise tail end, however my personal favourite is the MAC 208. This brush is small yet firm which allows you precise application and packs on the colour!


Next up is the actual brow products, my 2 die hards are the Anastasia Beverly Hills Brow Pomade or the Illamasqua Brow Cake. Both of these will give you pigmented colour whilst lasting as long as you do. I've posted a colour guide below so if you're unsure of which colour to get, have a look below!


3) Step by Step.
Before you even start on your brows, I recommend priming your eyelids so you're ready for your eyeshadow or mascara afterwards, I like to use MAC Prolongwear Concealer for this or Collections Concealer which is only £4 (Step 1)! Next up, you want to start by loading your brush with your chosen product and tapping off any excess. Start about a 1/3 of the way into your brow and start to brush the product along the base of your eyebrow trying to keep the line as straight as you can (you can go outside of your natural brow if it allows you a more precise shape). Follow this by doing the top of the brow, allowing your brush to create a nice subtle arch which should be just above the pupil of the eye (Step 2). Any leftover product should be subtly dragged through the first 1/3 of the eyebrow to create that gradient or ombre effect we all love! Comb through the brows with a clean mascara wand to soften the look (Step 3). The final step is to get a small, firm concealer brush and line along the edges of the brow with a cream concealer 2 times lighter than your own skin tone (Step 4) then blend out with your finger, this will give you a lifted effect and the illusion of more arched brows.

Brow Before.

 Step 1

 Step 2

 Step 3

 Step 4

Finished Brow!


 If you'd like any more tips & tricks on anything makeup related, leave me a comment and let me know! :) 

ARK xo

Anastasia Colour Guide!

Taupe - Best for those with Ashy Blonde/Light Brown hair who like a natural effect.
Blonde - Best for those with Golden Blonde/Light Brown Hair who like a natural effect.
Caramel/Soft Brown - I have both of these and honestly they are very interchangeable. Best for those with Warm Dark Blonde/Light Brown hair.
Auburn - Best for those with Warm Light Brown/Auburn/Red hair.
Medium Brown - I found this one to be darker than it sounds. For Ashy Medium Brown/Dark Brown hair.
Chocolate - Best for those with Warm Dark Brown hair or who like a dramatic effect.
Granite - Best for those with Ashy Dark Brown/Black/Blue Black hair or those who like a dramatic brow.
Ebony - Best for those with Neutral or Warm Dark Brown/Black hair or those who like a dramatic brow.

Thursday, 12 March 2015

Origins Ginzing Energy Boosting Moisturiser Review

My love of Origins products continues with this little review of the Ginzing Energy Boosting Moisturiser. In spite of loving their Mega Mushroom face cream, it wasn't quite working in the morning before I put my makeup on so I trawled their website looking for something lighter. I had heard amazing things about this moisturiser from everyone who used it, so decided to give it a bash as my new day time face cream.


What Origins say- 
"Origins Ginzing instantly hydrates and revs up radiance. This lightweight, oil-free, skin energy drink fortified with legendary skin-boosters like Panax Ginseng and Coffee Bean, jumpstarts skins hydration levels. Lacklustre looking skin is rapidly refreshed and revitalised to create a healthy, vibrant glow."

Yet again, the first thing you notice about this product is the smell; a bright zingy citrus smell which I love as it definitely wakes you and your skin up in the morning! The texture of this is a light gel-cream formula so will be perfect for normal to combination/oily skins which are dehydrated, as it gives you a moisture boost without being thick and clogging pores. The promises of more hydration and radiance are definitely fulfilled, as I notice a massive difference when applying and to the look of my makeup if I don't use this. This leaves my skin looking brighter and plumped with moisture, as well as making my makeup glide on smoothly and adding a radiant glow. All in all, this would be absolutely perfect for those of you have any hint of oil on the skin but have dehydration or anyone who's looking for a lightweight cream for under makeup!

ark xo

Friday, 6 February 2015

Beauty on a Budget


It's no secret that I love my high end makeup products, however there are some hidden gems among high street brands that I also love and are great if you're on a bit more of a budget. Also, sorry about the lack of pictures, I'm having problems with my blog layout that hopefully I'll be able to rectify soon...

Foundation
Now, with regards to foundation I think it is one makeup item where you definitely get what you pay for. Personally, I have never found a cheaper foundation that I would be comfortable wearing every day however there are some good ones out there if you're on a budget. 

Rimmel Wake Me Up Foundation is a great budget buy for those of you looking for that healthy, glowy finish that can be hard to find on the high street. It overs fairly decent coverage which is build-able and I found it fairly moisturising for my dry skin. Perfect for those with drier skin or who love a glowy finsih. £7.99

Revlon Photoready Foundation is another great radiance boosting foundation which I used to wear a few years ago. It gives your skin a lovely radiant finish combined with great coverage which, in my experience, lasted all day without touching up. Perfect for those who like radiance & longevity from their foundation. £12.99

Revlon ColourStay Foundation is a great alternative for your die-hard Doublewear fans out there. It gives great coverage with a matte finish and unparalelled longevity from a cheaper brand. The only thing to be mindful of is the fact that matte (and especially long lasting) foundations can enhance a drier skins appearance and texture. Perfect for those with Combination/Oily skin who need something that won't budge. £12.49


Concealer

Collection Lasting Perfection Concealer is an amazing product without even looking at the price. In the past it has been compared to the Estee Lauder Doublewear Concealer which I would say is a fair comparison (the Doublewear is only slightly creamier). This stuff is perfect for blemishes and gives amazing coverage to under eye circles, and all of this combined with amazing staying power. £3.99

Rimmel Wake Me Up Concealer is great for those of you who love a light reflecting concealer for under the eyes. This one doesn't give quite as much coverage as the Collection but is great for a more natural, dewy finish around the eyes. £5.49

Bronzer

Bourjois Delice de Poudre Bronzing Powder; also known as "the Chocolate Bronzer" comes in a variety of colour options for all skin tones and has great pigment without the fear of looking dirty after application. Oh, and did I mention it smells like chocolate!? £7.99

Blusher

Sleek Blush or Blush by 3 are amazing in their own right. These blushers actually rival a lot of the high end blushers I've used in my time, and they are cheap as chips! A wide range of colours and finishes are available, my favourites being Rose Gold (dead ringer for the famous NARS Orgasm), Pomegranate and Sunrise. £4.49 or £10 for Blush by 3.

Contouring & Highlighting

Sleek Face Contour Kit or Face Form are one of the best products out there for powder contouring & highlighting. They come in 3-4 shades to suit the fairest of skins right down to the darkest. They give fabulous pigment from the contour powder and a gorgeous glow from the highlight, not to mention these will last you countless contouring sessions. £6.49 or £10 for Face Form

Brows

Sleek Brow Kit is a great cheaper alternative to the likes of your Benefit Browzings or Illamasqua Brow Cake. It comes with a soft wax for setting your brows, a powder colour for filling in, a small set of tweezers and 2 little brushes (which personally I would chuck in the bin) so everything you need to create the perfect arch. £8.50

Mascara

I'm not even going to bother listing mascaras that are great from the High Street as there are far too many, and I think mascara is such a personal thing. I've used mascara and hated it but my mum or best friend would absolutely love it. Just experiment, but I generally find you can't go wrong with Max Factor or Maybelline.

Eyeliner

Rimmel Glam Eyes Liquid Liner is one of the best liquid liners I have ever used point blank, which is such a bonus when it's so cheap. Deep black, long wearing and easy to apply this one ticks all of the boxes! The only grumble I have with this is when its drying, it can make my eyes feel a bit sensitive but I can deal with that because it's such a bargain. £5.29


Rimmel Scandal Eyes Waterproof Kohl Liner is one I have just recently purchased in a few colours and I'm really enjoying it! It has a similar creamy, smooth texture to my favourite Urban Decay 24/7 and has great longevity even in the waterline. £3.99


Maybelline Eye Studio Lasting Drama Gel Eyeliner is one you've probably heard of before. Very comparable to most high end gel liners I've used and better than most of them too. Smashed my Bobbi Brown out of the park. Rich black colour and amazing staying power. £7.99 


Eyeshadow

Sleek Palettes are absolutely fantastic little finds. They come in all the shade ranges you could possibly want and have amazing pigment to boot. My first makeup palette was the Sleek Storm palette and I used it until it fell apart, and since then I have bought others from the range and still use them to this day. Each palette contains 12 eyeshadows which is a total steal at £7.99

Makeup Revolution Palettes are a new one I came across whilst shopping the other day. I found it funny how 3 of their palettes seem to be blatant copies of a very famous brands eyeshadow range! They have a wide range of colours for everyone's preference with great pigment at only £4 a palette!


Lipstick
Again with lipstick and lipgloss, I don't see the point in listing all the amazing ranges out there. If you swatch them on the back of your hand, you'll get an idea of the colour, finish and whether you will like the product or not :) 

If any of you know any great options for budget buys I haven't mentioned, please post in the comments! xo

Tuesday, 18 November 2014

Lime Crime Velvetines Review - Red Velvet & Utopia


I've always fancied some Lime Crime products ever since they launched as I've read Doe Deree's blog for years. In spite of many saying she's a bit of a crackpot, I was still dying to try these bad boys in particular. With the promise of pigment intense colour that dries to a gorgeous matte finish that lasts the whole day, who wouldn't be dying to get their hands on these? I picked up Utopia, (a gorgeous pink-purple orchid colour) and Red Velvet (bright blue based, true red).


I've used these for the past few weeks and I can honestly say they are probably the best lip products I've ever used. The colour that's in the tube? That's what it will look like on your lips. They're so crazily pigmented and with so little product used to achieve that effect! You swipe them on like a lipgloss but within a few minutes they dry to an "on-trend" matte finish that looks incredible on everyone. What I found most surprising, is that these didn't dry out my lips at all; unlike other matte lip products I've tried in the past. I would personally use a lipliner with these so you can draw an exact outline of your lips, however I've had no problems with bleeding so you can go without one.  

 Wearing "Utopia"

Wearing "Red Velvet"

For £13.50, you cannot go wrong with these if you're wanting a bright lip for a special occasion. I got mines from Love Makeup, but beware because they constantly sell out!

xo

Sunday, 16 November 2014

Contouring, the product low down

I asked you all what you wanted to see and one of the requests was how to contour. Kim Kardashian and her amazing makeup artist are to thank for the big revival of contouring; and who could blame her for loving it. I for one join her in the love for contouring and highlighting as I unfortunately was blessed with a ball face instead of chiselled out cheekbones. Not to worry, in this post I'll address what products to use to fake killer bone structure as well as bigger or smaller features. 

The first thing to address when talking about contouring is whether you want a powder or cream contour. For the sake of this post, I'll talk about both however cream contouring is significantly more difficult and I personally wouldn't recommend it for a beginner. For a powder contour, you're going to need a cool toned bronzer/blusher which is at least 2 shades darker than your natural skin tone. By cool tone I mean something without an orange or yellow undertone, a cooler tone creates a more natural shadow on the face. My go to contouring product is MAC's Blusher in Harmony, as I find it suits a wide variety of skin tones and is the perfect colour. Other products I've used are the Anastasia Beverly Hills Contour palette, NARS Laguna Bronzer and Sleeks Contour Kits all of which are great alternatives. Next up if the kind of brush you use for contouring, I'd say this is the most important part as the kind of brush makes a massive difference to me when contouring. The MAC 109 Small Contour Brush is my personal favourite as it's small enough to get right into the hollow of the cheek but also blends the product seamlessly. The MAC 168 is also a great brush if you're looking for a more natural and softer contour as this is fluffier therefore doesn't pack on as much product. However, with this brush I'd save your money and go with the Crown Brush C405 which is a great dupe and (dare I say) even better than the MAC one.


Now with a cream contour, you're basically going to use a very light concealer to highlight and a much darker concealer to contour. Sound like a lot of makeup? Well it is, not an everyday look and definitely more for special occasions or nights out. For cream contouring, I use the Bobbi Brown Foundation Sticks in Porcelain and Espresso. These amazing foundation sticks blend seamlessly to avoid that "dirty" look that so many of my clients talk about when they've tried contouring in the past. For a cream contour, your tools are key in order to achieve a perfectly blended effect. Personally, I use a Real Techniques Beauty Blender sponge (dampened) to melt the product into the skin and seamlessly blend colours together.


I'll be following this post with a "How to" blog post or video to show the techniques of creating a perfect contoured look. I hope you enjoyed this post and found it useful!

xo

Wednesday, 12 November 2014

Full Coverage Series: Laura Mercier Silk Creme Foundation Review

Following on from my "Foundation - What to Look for" post, I thought I would start a series of reviews of foundations, specifically full coverage as that's what is requested most when I'm freelancing. Full coverage foundations can be a tricky thing; we all want the best coverage possible but for it to look natural all in the one go. To start my series, I've chosen Laura Mercier's Silk Creme Foundation which is one of my personal favourites.


What Laura Mercier say -
"Smooth on this creamy foundation and watch imperfections, hyper pigmentation and even fine lines disappear. The long-wearing formula is blendable, glides on easily, giving you a fresh look that lasts all day."


Wearing Laura Mercier Silk Creme in Cashew Beige (unedited) 

To be perfectly honest, I'd say that description sums up this foundation perfectly. Silk Creme is a rich, creamy foundation which is unbelievably pigmented and therefore means you require the smallest amount to get amazing coverage. I particularly love the texture as it feels so beautifully moisturising for my dehydrated skin and I find no matter how thirsty my skin is, it doesn't drink in this foundation.  Silk Creme has a satin, luminous finish to it and definitely gives you a gorgeous glow which looks great in pictures (near impossible to find in a foundation, can I add). The staying power is fantastic as well, however I definitely recommend using a primer underneath, particularly if you are combination or oily so the foundation doesn't slide. My only grievance with this is the colour range, it really doesn't cater for everyone especially those of you with darker skin tones. The darkest shade is Hazelnut beige which I attempted to wear on holiday this year and was much too light. Come on Laura Mercier, give us more shades! All in all, I really do love this foundation and most people who try it love it too. The only thing I could say is I've found people with oily skin don't tend to favour it as it is a very creamy texture. 

Have you tried this? What did you think?

ark xo 

Sunday, 19 October 2014

MOTD - Brown Smoke

Just a quick little post to take you through the products used for this makeup! Excuse the rollers! Picture is completely unedited.


Face: Clarins Beauty Flash Balm used as primer followed by Laura Mercier Silk Creme foundation in Cashew Beige mixed with a little Giorgio Armani Luminous Silk foundation in 6.5 Contoured with MAC Harmony Powder Blush. Highlighted with NARS Orgasm Illuminator and Tom Ford's Contouring Cheek Colour Duo in Stroked. 

Brows: Anastasia Beverly Hills Dipbrow in Chocolate with angled MAC 263 Brush.

Eyes: Laura Mercier Gel Eyeliner in Brown as a base. Urban Decay Eyeshadow in Snakebite blended out with MAC Eyeshadow in Texture. Urban Decay Eyeshadow in Blackout in outer corner. MAC Eyeshadow in Nylon as inner corner highlight. Tom Ford Liquid Eyeliner. Eldora Lashes in M106.

Lips: MAC Lipstick in Hue.

ark xo

Friday, 17 October 2014

Origins Dr Weil Mega Mushroom Soothing Face Cream Review


Following up on my previous post "How to Make your Makeup Look Better", I thought it would be the perfect time to do a skincare review. The Origins range of skincare has always appealed to me due to the plant base of all of their products and the fact they are free from all chemical nasties. After looking through their website, my first origins purchase was the Dr Weil Mega Mushroom Soothing Face Cream. 


What Origins say -
"This remarkable hydrating cream instantly calms the skin. Visibly reduces redness and sensitivity. Great for sensitive and reactive skin"

Now my skin is in no way sensitive but in my experience, moisturisers designed for sensitive skin tend to be a lot richer which is what I like in (particularly) a night time face cream. The first thing you notice about this is the amazing smell; it reminds me of Clarins Blue Orchid Face Oil if any of you have smelled that before. It's a very natural plant-based scent which smells soothing much as the name would suggest, which I can imagine some people hating but I love. The cream has an rich almost balmy texture to it making it ideal going into the winter months for particularly dry or dehydrated skin. In terms of results, I have definitely seen a difference in the hydration levels of my skin; leaving it plumper and more even in texture. In terms of the claim that it soothes sensitised skin, I can't really comment as my skin is not sensitive but I do imagine it'd be great for those who are. All in all, I'd say this is a great moisturiser for anyone who has dry or dehydrated skin looking for soothing to hydrate and even the texture of the skin but definitely avoid if you're oily or combination.

ark xo

Thursday, 16 October 2014

5 Tips on How to Make Your Makeup Look Better


This post comes with a warning, you probably wont want to hear some the tips I'm going to give you in this post because very little of it has to do with what makeup you use or how you apply it. Sorry guys! However if you're intrigued to what little things you can do to improve the look of your makeup, read on!


1) Drink lots of water - I know, I know! You'll have heard this 100 times over from anyone who preaches about health but if you genuinely want to make your foundation in particular look better, then you need that H2O! Hydrated skin looks more plump, radiant and clearer therefore making your foundation look even better and you'll need less of it. Dehydrated skin is thirsty and looking for any water based product it can get making it more inclined to "drink in" your foundation, making it look patchy or dry.

2) Your diet shows in your skin - Again, another thing you didn't want me to say but honestly, you are what you eat (well your skin certainly is). I've worked on Makeup & Skincare counters for 5 years and it's amazing how much people are willing to fork out on expensive skincare but won't do the most obvious thing for their skin! If you are having a problem with your skin, I guarantee it will be related to your diet, water intake or something you're using. I'm not saying you have to be perfect all the time, but making even small changes to the amount of veggies you eat or that one less takeaway will make the difference. Try it, you'll thank me later!

3) Skincare - The number of people I see using the best, most expensive makeup out there but don't invest a penny in their skin is crazy! The way I look at it is, if you had to paint a wall that hadn't been plastered correctly or in years, then your paint job is going to look rubbish. It's the same with makeup and skincare, they go hand in hand. I'm in no way saying you need to spend a fortune on your skincare, stores like the Body Shop do great ranges which are affordable. Everyone should be using at least a cleanser, exfoliate once a week and a moisturiser.

4) Priming - Prepping your face for makeup is such an essential step if you want your makeup to last and look fresher for longer. Now, most people think primer is only for the skin however there is primer or a way to prime for every area of the face. Facial primers can do amazing things in terms of making your foundation look better and there are different kinds depending on your skin concerns. Eyeshadow primers are absolutely key to making sure your eyeshadow doesn't crease, keep it looking fresh and vibrant and for bringing out the best pigmentation in all of your shadows.

5) Brushes - This is the one thing I cannot preach enough to anyone who wants their makeup to look better: Use good quality brushes. Going back to the paint analogy, would you paint your walls with your hands? I think not, so why would you put your foundation on with your hands? And the same goes for applying all parts of makeup, if you use amazing brushes, they will do the work for you.
I hope these tips were useful and if you have any of your own, please leave them in the comments! :)

ark xo

Tuesday, 14 October 2014

Foundation - What To Look For

In the shower this morning, I was pondering what would be the best blog post I could start off with. I wanted something that could help my Makeup clients and general blog readers alike and without a doubt, I get asked the most questions about Foundation.
The foundation struggle is real guys. The beauty industry is completely saturated with so many different types, each promising you that you will look like Cara Delevingne when you use theirs. Go to any counter and they will ask you what coverage you want and what kind of finish you are after, even though so many people don't even know what these mean! So I'm hear to help lovelies, here is the basics of Foundation!
The first thing you need to think about when shopping for a new foundation is coverage. Coverage basically means how much of your skin the foundation will cover (e.g. blemishes, spots and uneven tone).
Tinted Moisturiser -
no cover, will only add a slight colour to your complexion.
BB & CC Creams -
 extremely light cover, mainly to even out the tone of the skin.
Light -
covers minor imperfections, looks very natural & almost like your own skin.
Medium -
will cover most imperfections, can still look natural if applied correctly.
Full -
 covers all imperfections and leaves little of the skins natural tone & look visible.
Max -
completely covers all skins natural tone and leaves almost doll-like perfection.
The second thing to consider when purchasing foundation is what kind of finish you want your foundation to have.
Matte -
almost powder like finish with absolutely no shine. Most artificial looking finish. Best for Oily skin.
Satin -
almost matte with a slightly less powdery finish. Best for normal to oily skin.
Luminous -
gives a "lit from within" appearance to the skin. Most natural & skin-like looking finish. Best for normal to dry skin.
Dewy -
gives an ultra bright, radiant and slight sheen to the skin. Best for dehydrated and dry skin.
There are various other things you may consider when choosing a foundation, whether or not to have SPF is a big one. SPF in foundations is fantastic if you don't have a great skincare routine as it means you're still protecting yourself from sun damage, however if your daily moisturiser has SPF then there is no need for your foundation to have it too. SPF is a very important thing to consider if buying a foundation for nights out as the titanium dioxide included in sun protection causes a flash back effect in photos making your face look much paler than elsewhere on the body. You may also want to consider if the foundation claims to have any skincare benefits (e.g. moisturising) and the feel/texture of the foundation, for example if you want a full coverage but do not want the feeling of a heavy foundation.
I hope this helps anyone who feels confused about all of the Makeup lingo used around foundation and makes identifying what you need a little easier! If you have any questions, leave them in the comments below and I'll see if I can help :)
ark xo


Monday, 5 May 2014

Beauty Haul

Hello lovelies! Well it'd been that glorious time again when our bank accounts fill back up to a beautiful level and we can afford to treat ourselves! So, with that in mind I got a fair few bits and pieces to cheer myself up this month and in this post I'll show you the beauty items that I picked up.

First stop, MAC! The reason I went into MAC in the first place was to pick up the "Harmony" blush as I'd seen a few pictures of girls wearing this on instagram as a contour and it looked gorgeous. It's the perfect cool toned brown blush with a matte finish. It's my go to for contouring now!


I feel like everyone and their granny had tried Strobe Cream apart from me! Everyone raves about this product to prep skin before foundation or to mix with foundation to give your skin more luminosity. This is a completely different texture from what I expected, but I'm loving this underneath my usual foundation or on it's own if I'm just going to the gym or something.


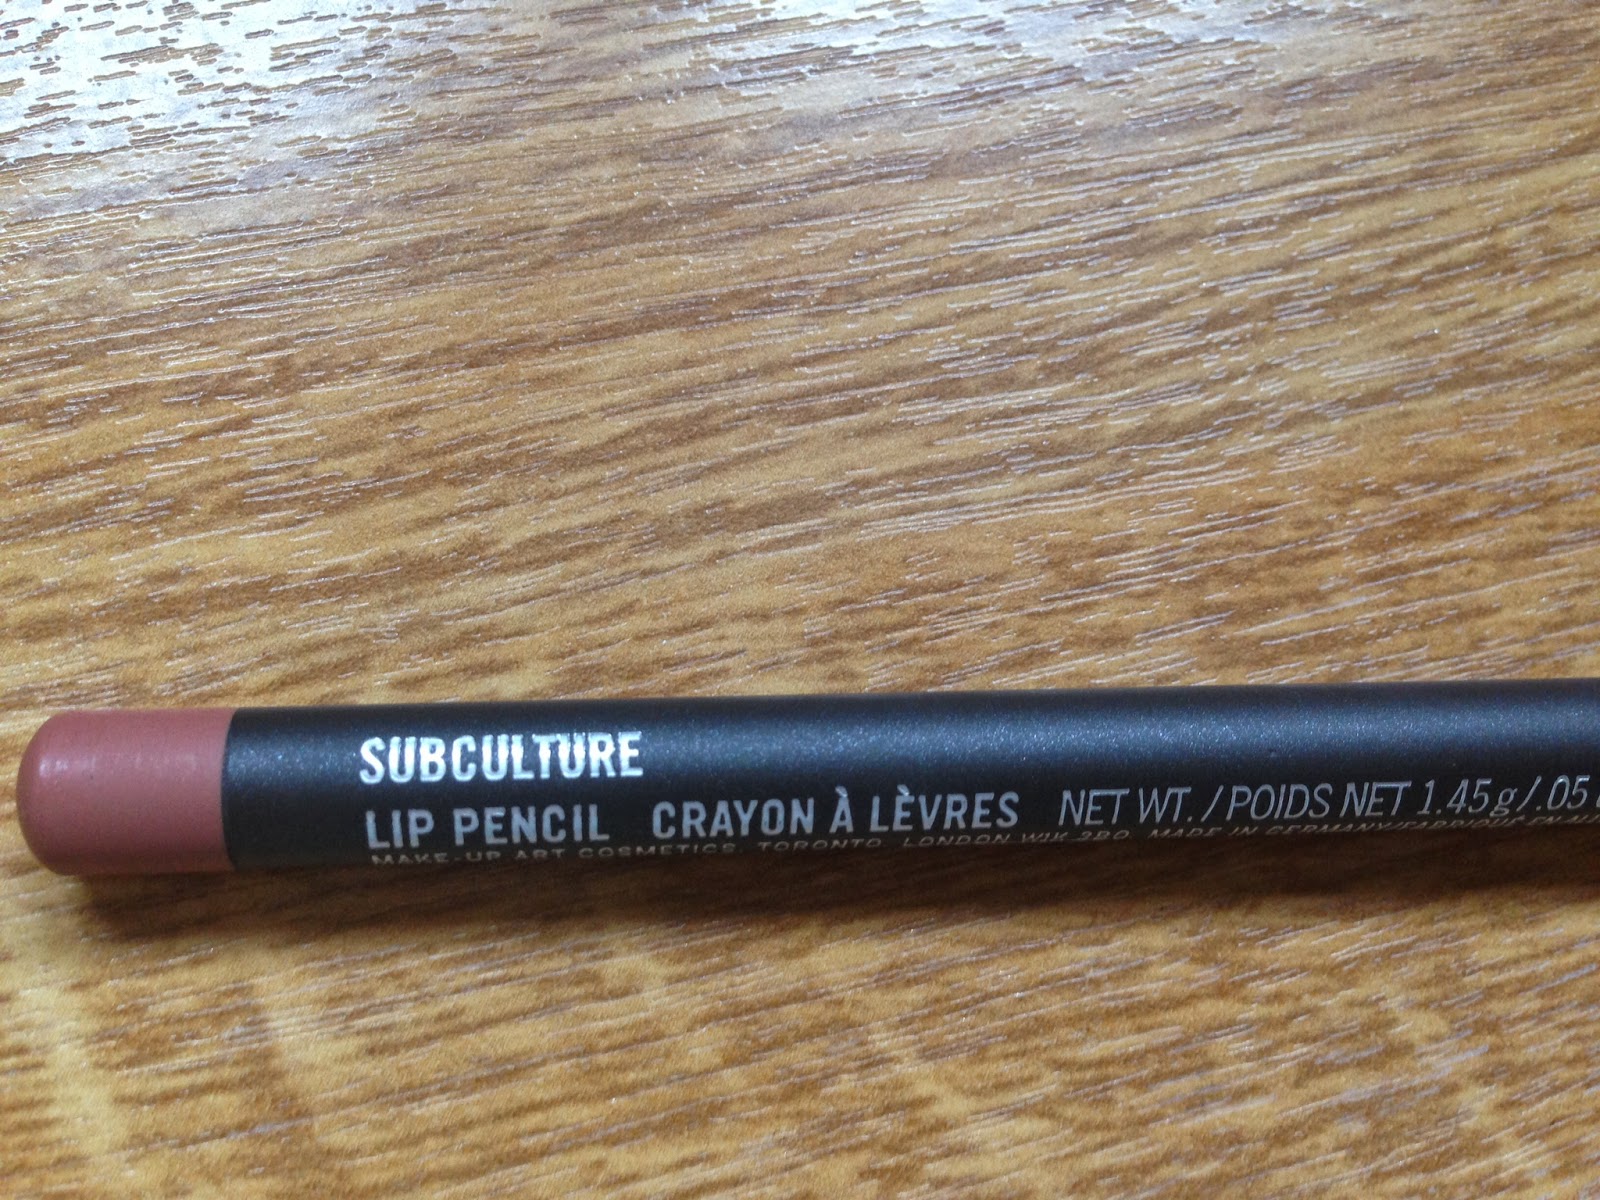
I fancied some new lip liners as I've not really tried any MAC ones apart from Cherry which is my absolute must have when creating a red lip. I saw this little nude number and picked this up too. It's a little bit lighter of a nude than I normally go for, I'd say this would probably go perfect with the likes of Hue and Myth.

 And obviously, I needed a little Cherry replacement :)

 
I've been looking for a nice coral lip pencil for a while now and I couldn't seem to find one that suited the coral lipsticks I had in my collection. So, I was ecstatic when I swatched this bad boy and saw it was the perfect colour! If you're looking for a nice liner to go with Vegas Volt etc. I'd definitely suggest this.
 
 Eyeshadows are my favourite things to browse and play with from MAC. I love the vast range of shades and textures that they offer so I always end up coming away with at least 1 new shade every visit! The shades I plunged for were Moons Reflection, Coppering, Naked Lunch and Cranberry. Moons Reflection is a stunning cornflower blue colour, Coppering is a red based copper, Naked Lunch is a frosted nude with warm undertones and Cranberry is an old favourite of mines and had to buy a replacement as mines crumbled! It's a stunning metallic plum.


And finally, I picked up Love Nectar Lustreglass. Just to let you know, I am NOT a lipgloss person at all... I very rarely wear it as I find it high maintenance and just a plain bugger. However, I saw this and I fell in love. I do appreciate a lipgloss when I'm going for a nude lip and this is the perfect partner to any nude lipstick!
 
I also had a snoop around eBay to pick up some new bits and pieces for my kit. So I purchased a couple of cheap palettes to use on clients and I have to say I'm actually quite surprised at the quality!
 
This concealer palette was only £3 and the product is quite good! It's not amazing, but it works well for contouring and highlighting.


The 120 Palettes have intrigued me for ages and I finally decided to take the plunge and get the classic...and the neutral too! These eyeshadows again, aren't blow you out the water amazing but they do well for when you're looking for a specific colour and would be great for beginners!


Tuesday, 29 April 2014

Review: Advanced Night Repair Eye

There is so much debate out there about eye creams; whether they are really necessary, if they work etc.  and in spite of working within the beauty industry, I would wholeheartedly say I'm not 100% convinced about them. I've tried a few, not many to be perfectly honest because I don't find them a staple to my skin but I have found one I like and it's the Estee Lauder Advanced Night Repair Eye.


The Advanced Night Repair Eye Concentrate promises to do everything that the facial serum does for your skin but for your eye area. So essentially that tells me it's going to make my eyes look amazing! I wouldn't quite say it does that, but it definitely does help in a few ways. If I don't use any product at all on my eyes, they tend to dry up and get a little flaky (this is due to the fact that your eyes can't moisturise themselves as there are no oil glands around the eyes) and this product definitely elimates that. I also love the texture of this, it's a rich gel cream which feels beautiful & soothing when I place it around my eyes. Yet again, only being 22 I can't comment on the anti-aging aspect that this little pot promises however I do feel my eye area feels plumper, mainly due to being moisturised. 

Overall, I'd definitely recommend this if you're looking for a nice eye cream and have money to splurge however due to the fact I don't see a massive difference with them, I'll still be on the search for a cheaper alternative.

Pros: Texture // Moisturising
Cons: Price // Not huge effects

Available from Debenhams, House of Fraser, Boots, John Lewis etc. for £38

What's your favourite eye cream? Please tell me any cheaper alternatives! :)

Monday, 21 April 2014

FOTD: Plum Smokes

I had a rather exciting interview today for a job working as a Makeup Artist in a Glasgow based salon so I decided to do something a little bit different from my usual brown smokey eye, it's so easy to get stuck in a rut doing the same things with your makeup! I love this look, it's still smokey but with a little bit of colour to give it a more summer feel.

Products used -

Face: Clarins Beauty Flash Balm as Primer. Laura Mercier Silk Creme Foundation in Cashew Beige mixed with Nars Orgasm Illuminator (loving this combination for more dewy "summer" skin). MAC Ambering Rose Blush. Estee Lauder Bronze Goddess Bronzer in Deep to contour. Estee Lauder Heatwave Highlighter (L.E). Estee Lauder Doublewear Concealer in Warm Light for under eye.

Eyes: Illamasqua Brow Cake in Thunder for Brows. Urban Decay Naked 3 Palette using Strange as brow bone highlight. Urban Decay Primer Potion in Eden. MAC Eyeshadows in Star Violet, Cranberry, Swiss Chocolate & Sketch. Maybelline Gel Eyeliner in Black. Dior Mascara Base. Dior Extase Mascara in Black.

Lips: MAC Lip Liner in Magenta. MAC Lipstick in Impassioned.

What do you think? Do you experiment with your makeup or do you stick to the same looks you know work? 

Favourite Cleansers

Cleansers are, possibly, the bane of my skincare routine. I have fairly normal skin, not dry and very rarely oily so you would think finding a cleanser that I like would be easy as pie. I wish! I find that about 90% of the cleansers I try, I absolutely hate. So I thought I'd share a few of my favourites in hope that I can help anyone out there looking for a lovely cleanser - 

Favourite Foaming Cleanser


I love using a foaming cleanser but my skin really doesn't love me when I use one. This is because my skin is very dehydrated so in general they leave my skin feeling stripped. I've search high & low and feel like I've tried just about every foaming cleanser on the market and the only one that doesn't leave my skin crying out for moisturiser is the Clarins Shea Butter Foaming Cleanser. It doesn't matter how many different foam cleansers I buy, I always end up chucking them out in favour for this one. It's so beautifully gentle on the skin, whilst leaving it with that squeaky clean feeling that I love. The shea butter really leaves my skin feeling comforted and soft after using this, and it cuts through my face makeup really quickly too. The only downside of this is the price, however your tube lasts you forever & a day because this stuff foams up like nobody's business! Well worth it ;)


Favourite Cream Cleanser


Everyone is going to think Clarins pays me to rave about their products but they don't, I promise! I genuinely believe that their cleansers are the best on the market today. My favourite cream cleanser of theirs is the Alpine Herbs Cleansing Milk. This stuff is gorgeous, so light in texture, beautiful smell, comforts the skin... Just a little treat to use! My only criticism of this is that if you're planning on using it to take off your makeup, you might be there for a while. I tend to use this if i'm double cleansing or after I've used a quick cleanser to get a proper good deep cleanse. 


Favourite Quick Cleanser


Now this is a new discovery for me and I'm so glad I've finally found a cheap skincare product that I actually like! The Loreal Micellar Water is a little godsend. For years I used the Clarins Water Comfort 1 Step Peach Cleanser to remove my makeup and loved it. It made whacking off all this slap a 2 minute job which made my life a little bit happier! However, I received this as part of a Christmas gift last year and I haven't looked back since. It cuts through makeup in a jiffy, doesn't irritate my skin or eyes, leaves my skin feeling clean and has absolutely no smell to offend me and at £4 what's not to like about that? The only thing I miss about my Clarins one is the scent, the peach-y smell was something I really enjoyed about the product but I can live without it for the sake of £16.

What are your favourite cleansers?

Friday, 18 April 2014

FOTD: Sunshine in Scotland!

Believe it or not, there is sunshine in Scotland today. This rarity inspired me to take my makeup to a little bit more of a Summer-y look!


 Products used for this look -

Face: Laura Mercier Silk Creme Foundation in Cashew Beige mixed with NARS Orgasm Illuminator. Estee Lauder Bronze Goddess in Deep. NARS Gilda Blush. Estee Lauder Summer Highlighter. Estee Lauder Doublewear Concealer in Warm Light.

Eyes: Urban Decay Primer Potion in Eden. MAC Eyeshadows in Texture, Swiss Chocolate & Embark.  Maybelline Gel Eyeliner. Dior Iconic Mascara. Anastasia Beverly Hills Brow Wiz. Illamasqua Brow Cake in Thunder.

Lips: Tom Ford Lipstick in Wild Ginger.

I'm also wearing my Foxy Lox Clip in Extensions here too, absolutely beautiful quality of hair which I would highly recommend. I have dyed my set so unfortunately I can't tell you the colour of these.

Is everyone enjoying this little heatwave? :)

Thursday, 17 April 2014

Health & Fitness


Now, before I say anything about Health and Fitness I would just like to point out that I'm no expert on either of these subjects. These are just my opinions and what I do to help keep fit & healthy.

Lately I seem to have finally caught the fitness bug, only after my 22 years on this Earth. This was largely inspired by my boyfriend who is a bodybuilder, so it's a little hard to keep sitting back doing nothing when your other half is a...well...tank.
So, a couple of months ago I made the decision to join my local gym and start exercising regularly, as well as making general changes to my diet. I was incredibly apprehensive about joining a gym as I had visions of all these people who looked amazing looking at me thinking "What the hell is she doing here?"but after a few weeks these disappeared and I actually started enjoying going to the gym.

My exercise routine consists mainly of weight training & some light cardio, I find these to be the most sensible and effective way of reaching my fitness goals. The goals I set are pretty normal for most people, just tone up and lose body fat, which so far I have successful in doing. The routine I follow consists of 3 different days - Back, Leg & Chest. On back day, typical exercises include Deadlifts, dumbell rows, lateral pulldowns & medicine ball twists. Leg day is all about weighted squats, lunges, kettle bell swings etc. Chest day involves more pushing exercises. I also try and incorporate some more abdominal exercises at home when I can. 

Nutrition wise, I pretty much do the obvious thing, I eat as healthily as I can most of the time. Breakfast is typically Wheatabix with almond milk or porridge, lunch can be anything from wholemeal chicken wraps to lentil soup and dinner I tend to stick to either chicken or beef with rice. In some of these meals or post gym, I'll have a protein shake as I find it hard to eat as much protein as I should. The result of these changes to my diet has been huge, I have so much more energy, I feel less tired and I'm not plagued with sugar headaches. Don't get me wrong, about once or twice a week I'll pig out and have a "cheat" meal where I pretty much have exactly what I want and don't feel guilty about it. These meals are such a treat for me now that I value them so much more than if I ate them every day.

In terms of what I have to drink, I've always only drank water anyway so that wasn't a big change. Instead of coffee, I'll have green tea with lemon which gives me a bit more energy if I'm flagging. When it comes to alcohol, I still drink but very occassionally. I find my body doesn't react well with even small amounts of alcohol anymore and, to be honest, I can't handle the hangovers anymore!


All of these changes to my lifestyle have made me see definite changes to my body and health. I'm stronger, leaner, more energetic and toned. 
I'll keep you up to date on my progress throughout the months. Feel free to ask me any questions and I'll answer them as best I can!

Tuesday, 15 April 2014

FOTD: Theatrical Eye

This started off meaning to be a glitter cut crease, then I just went a bit crazy and it turned into more of a Swan Lake-esque looking eye!


Yeah, so a little OTT but I still quite liked it all the same! :)

Eyes: Urban Decay Primer Potion in Eden. Inglot Pure Pigment in 23. My own Silver Glitter. MAC Eye Pencil in Smoulder. Urban Decay Eyeshadow in Blackout. Inglot Eyeshadow in 23. Maybelline Gel Eyeliner in Black. Eylure Girls Aloud Lashes in Nadine. Max Factor False Lash Effect Mascara. Illamasqua Brow Cake in Thunder. MAC Vanilla Pigment to Highlight.

Skin: Laura Mercier Silk Creme in Cashew Beige. Sleek Contour Kit in Medium. MAC Melba Blush. MAC Mineralize Skinfinish in Soft & Gentle.

Lips: MAC Lip Pencil in Nightmoth. MAC Lipstick in Rebel.

Review: Lush Oatifix Handmade Fresh Face Mask

Who doesn't love a little treat from Lush every so often? Even walking past that shop makes me happy, the smell is just amazing. On a recent shopping trip I found myself being drawn in to treat myself to a couple of goodies. After looking around, I decided I didn't actually need 99% of the lovely products and plunged for 2 face masks as I've ran out of my regular one.

I told the assistant that my skin is Normal/Dehydrated and that I'd been having some issues with breakouts around my chin. She actually suggested just about every face mask that they sell, so I pretty much had to make my own decision. In the end I plunged for Oatifix and Cosmetic Warrior (review for this to follow).


Lush describes this to be for a dry, sensitive or irritated skin and contains oats, ground almonds and mashed banana in order to soothe and comfort. My first impression was that I loved the smell of this, which I find odd because I cannot stand bananas! It reminds me of being a little girl and eating some Ready Brek with honey, a right wholesome, comforting smell. I applied this to my skin after cleansing, and I would recommend doing this over a sink or in the bath as oats were going everywhere! I enjoyed the sensation of this on my skin, however I was conscious of it falling off my face (maybe I should have got a bowl and had the remains for my supper?). However, my skin did feel baby soft and smooth after using this I guess due to the light exfoliation. I wouldn't say it exactly addressed my concerns exactly but would be perfect for someone who has a dry or sensitive skin. And remember to keep this one in the fridge, but try not to accidentally have it for your breakfast! ;)


Pros: Smell // Softens skin // Soothing
Cons: Messy // Has to be used up quickly due to fresh ingredients

 photo blanklogofull.png